Introduction
PodFetch is a simple, lightweight, fast, and efficient podcast downloader for hosting your own podcasts. It supports all the features you would expect from a podcast player, including:
- Downloading podcasts
- Listening to podcasts
- Searching for podcasts
- Managing your subscriptions
- Managing your podcast episodes
- Managing your podcast feed
- Host your own Gpodder compatible podcast feed
- Start listening on your phone and continue on your computer
All you need to do is download the latest release from the release page or use the listed docker-compose file to get started.
S3 configuration
So you want to use an S3 compatible storage backend to e.g. host files central or save costs for storage provisioning in the cloud? PodFetch now also supports S3 configuration. This is also valuable if you want to use a self-hosted MinIO instance and don't want to map and mount volumes around. It is currently necessary that you have your files in S3 configured readonly so people can stream them from there.
| Environment variable | Description | Default |
|---|---|---|
S3_URL | The URL of the S3 service. | http://localhost:9000 |
S3_REGION | The region of the S3 service. | eu-west-1 |
S3_ACCESS_KEY | The access key of the S3 service. | / |
S3_SECRET_KEY | The secret key of the S3 service. | / |
S3_PROFILE | The profile of the S3 service. | / |
S3_SECURITY_TOKEN | The security token of the S3 service. | / |
S3_SESSION_TOKEN | The session token of the S3 service. | / |
Installation
Installation with Docker
Installation with Docker (SQLite)
version: '3'
services:
  podfetch:
    image: samuel19982/podfetch:latest
    user: ${UID:-1000}:${GID:-1000}
    ports:
      - "80:8000"
    volumes:
      - podfetch-podcasts:/app/podcasts
      - podfetch-db:/app/db
    environment:
      - POLLING_INTERVAL=60
      - SERVER_URL=http://localhost:80
      - DATABASE_URL=sqlite:///app/db/podcast.db

volumes:
    podfetch-podcasts:
    podfetch-db:
| Variable | Description | Default |
|---|---|---|
| POLLING_INTERVAL | Interval in minutes to check for new episodes | 300 |
| SERVER_URL | URL of the server/the URL of the proxy | http://localhost:8000 |
| DATABASE_URL | URL of the database | sqlite://./db/podcast.db |
It is important to change UID and GID to your user id and group id so that the files are owned by you and not by root.
Docker will create the volumes by default as root and podfetch will not be able to write to them.
Installation with Docker (Postgres)
To use postgres you need to set the following environment variables:
- DATABASE_URL=postgres://postgres:postgres@postgres:5432/podfetch
Installation without Docker
Requirements
- Download the latest release from the release page
- Create a shell script that sets the above environment variables and starts the podfetch binary
- Make the shell script executable
- Run the shell script
Terraform
For terraform have a look at the setup directory. There you will find everything needed to start with your infrastructure as code.
Basic Auth
Basic Auth is not required. If you use a reverse proxy like nginx you can use a better form that is also able to save passwords in your phone. If you decide to use basic auth you need to set all three variables below. Otherwise, the container will crash with an error message as a safety measure.
| Variable | Description |
|---|---|
| BASIC_AUTH | Set to true if you want to use basic auth |
| USERNAME | Username for basic auth |
| PASSWORD | Password for basic auth |
OIDC
PodFetch also supports OIDC authentication. If you want to use it you need to set the following variables.
If you enable it you need to disable BASIC_AUTH as it is not possible to use both at the same time.
Once you have created the user you intend to use as admin, you are then required to promote this user to admin via the command line.
Assuming your podfetch container is called $PODFETCH this can be done as follows, illustrating how the user sam is elevated to admin. (or uploader)
- Login with OIDC as user
sam - Run
docker exec -it $PODFETCH /app/podfetch users update - Enter the name
sam - Enter
role - Enter
admin - Login as
samagain and you should findsamis now an admin.
Keycloak
| Variable | Description | Example |
|---|---|---|
| OIDC_AUTH | Flag if OIDC should be enabled | true |
| OIDC_AUTHORITY | The url of the OIDC authority. | <keycloak-url>/realms/master |
| OIDC_CLIENT_ID | The client id of the OIDC client. | podfetch |
| OIDC_REDIRECT_URI | The URI the OIDC authority redirects to after authentication. | <your-server-url>/ui/login |
| OIDC_SCOPE | The scope of the oidc token | openid profile email |
| OIDC_JWKS | The JWKS token uri | <keycloak-url>/realms/master/protocol/openid-connect/certs |
Note: For OIDC authorities that allow for selecting between Confidential/Private and Public for the Client Type (for example Authentik), use Public, as PodFetch does not need a client secret.
Authelia
This assumes you already have OIDC set up in Authelia and your Authelia instance is being served on a subdomain https://auth.DOMAIN.COM with podfetch being served on it's own subdomain at https://podfetch.DOMAIN.COM
Podfetch Configuration
| Variable | Description | Example |
|---|---|---|
| OIDC_AUTH | Flag if OIDC should be enabled | true |
| OIDC_AUTHORITY | The url of the OIDC authority. | https://auth.DOMAIN.COM |
| OIDC_CLIENT_ID | The client id of the OIDC client. | podfetch |
| OIDC_REDIRECT_URI | The URI the OIDC authority redirects to after authentication. | https://podfetch.DOMAIN.COM/ui/login |
| OIDC_SCOPE | The scope of the oidc token | openid profile email |
| OIDC_JWKS | The JWKS token uri | https://auth.DOMAIN.COM/jwks.json |
Authelia Configuration
Configure the OIDC client in Authelia as below, you can change your authorization_policy and consent_mode according to your needs.
      - id: podfetch
        description: Podfetch
        public: true
        authorization_policy: one_factor
        scopes:
          - openid
          - profile
          - email
        consent_mode: explicit
        redirect_uris:
          - https://podfetch.DOMAIN.COM/ui/login
        userinfo_signing_algorithm: none
Reverse Proxy
You can also use a reverse proxy like nginx to do the authentication. PodFetch supports this mode by setting the following variables:
| Variable | Description | Example |
|---|---|---|
| REVERSE_PROXY | Flag if reverse proxy should be enabled | true |
| REVERSE_PROXY_HEADER | The url of the reverse proxy. | X-FORWARDED-FOR |
| REVERSE_PROXY_AUTO_SIGN_UP | Flag if PodFetch should automatically sign up users | true |
User Creation
You can create an admin, user, or uploader either through CLI or via invites.
To generate an invite, log into Podfetch → Top Right Icon → User Administration → Invites
UI
Audio Player
The podcast listening tool contains an advanced audio player that can be used to listen to your podcasts,skip episodes, turn the volumes as high as 300% or skip around in the current episode.

Continue right where you stopped
The tool will automatically save your progress in the current episode and will resume from where you left off even if you close the browser. You can continue listening on all devices by just hitting play on any episode on your home screen.
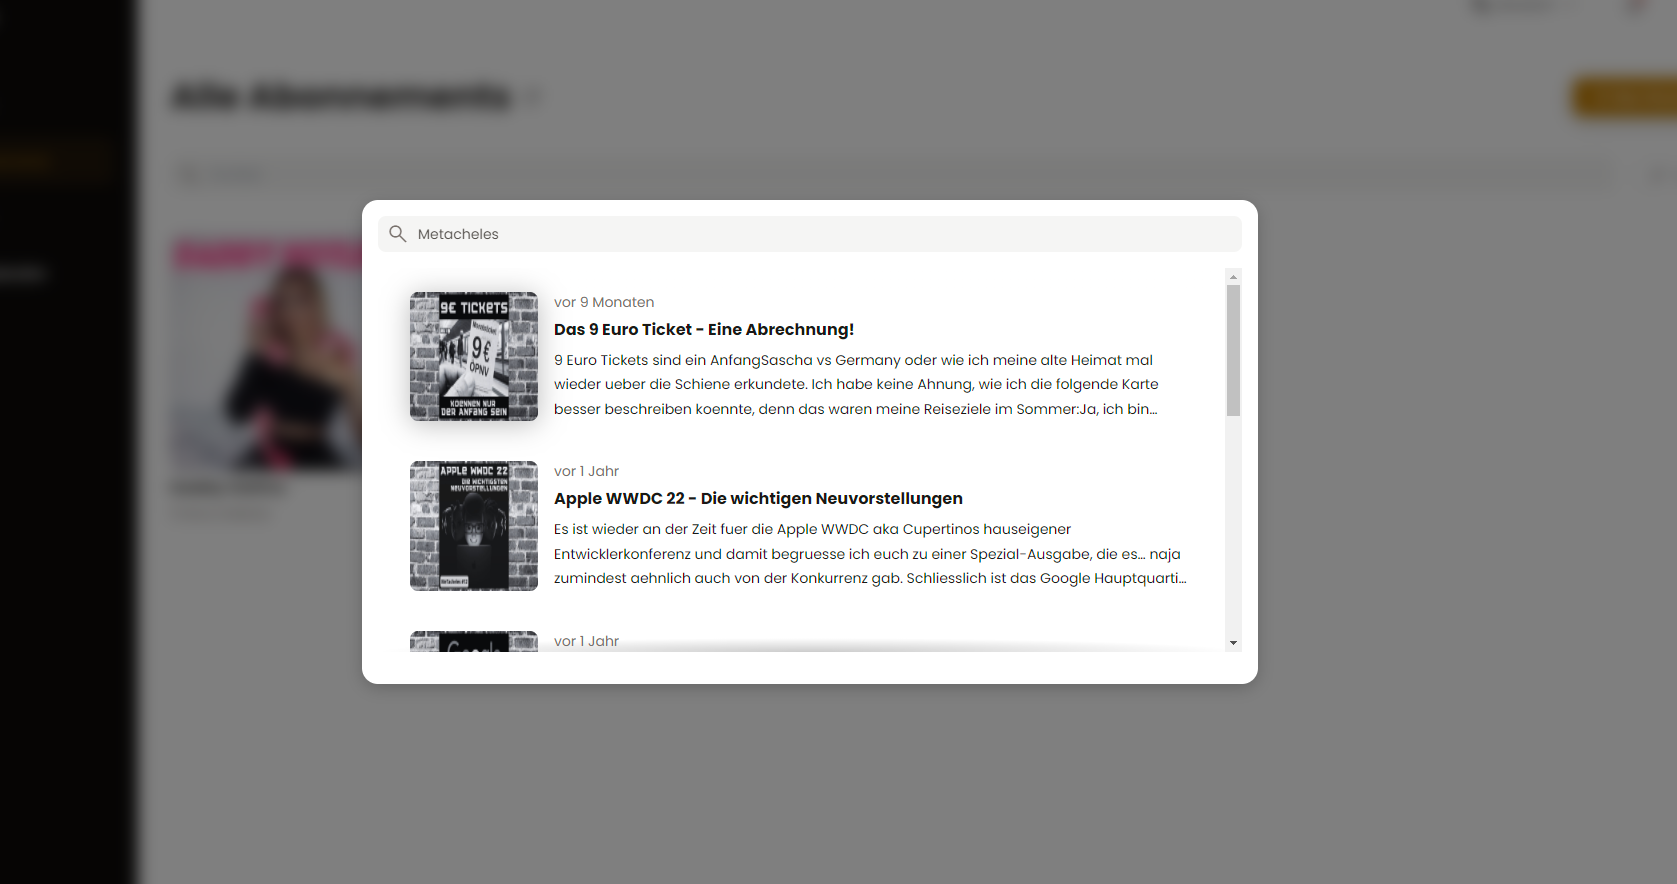
Search for podcasts
You can search for podcast episodes by hitting CTRL+F and typing any word that might appear in the description or title of the podcast episode you want to listen to.
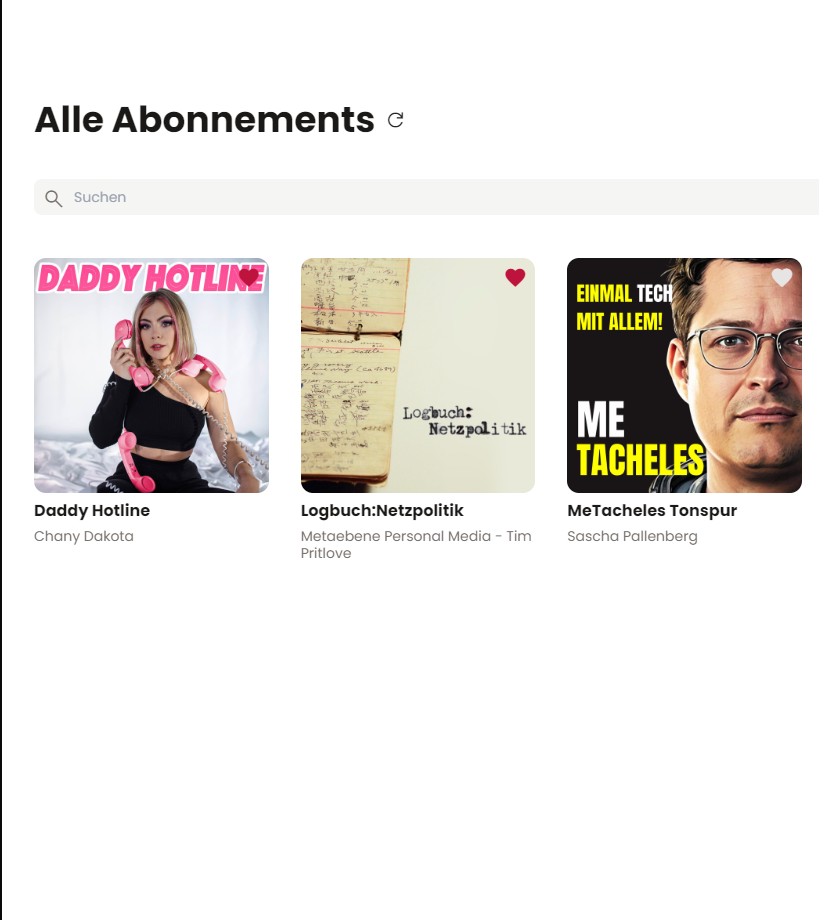
Below are some fullscreen images so you can get a better grasp of the UI.
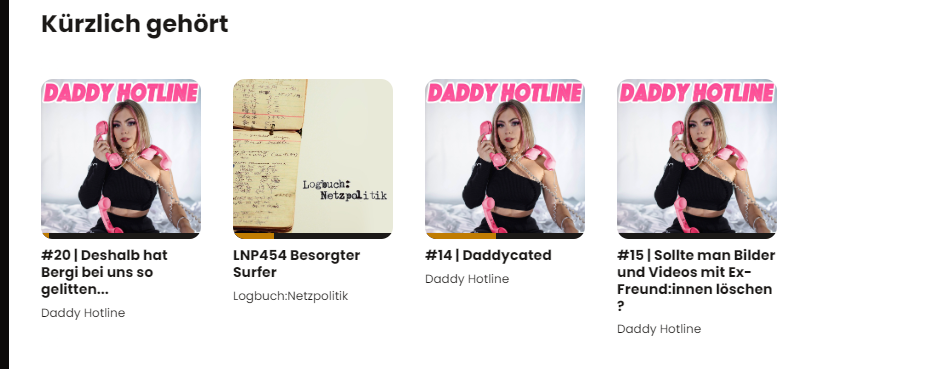
Home Screen
Timeline View

Info View
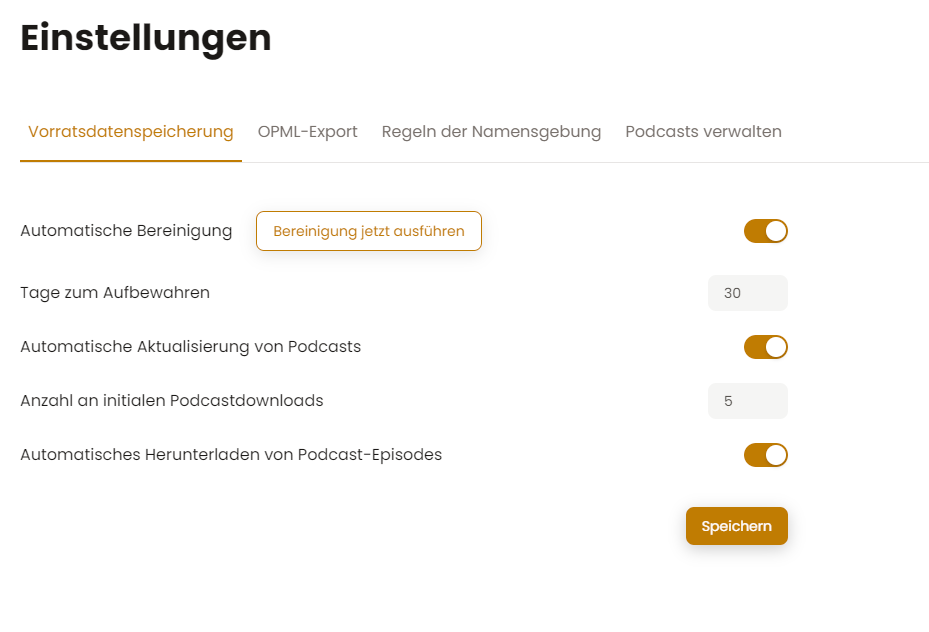
Settings
Administration
Proxy
Requirements
- Set the
SERVER_URLenvironment variable to the url of the proxy. - Turn on websocket support in your proxy
You won't be able to use your service via the plain local url as the websocket connection will fail.
If the SERVER_URL starts with
- https => Secured Websocket (wss)
- http => Unsecured Websocket (ws)
Telegram
PodFetch can also send messages via Telegram if a new episode was downloaded.
To enable it you need to set the following variables:
| Variable | Description | example |
|---|---|---|
| TELEGRAM_BOT_TOKEN | The Bot token that you can acquire from Botfather with /newbot | asdj23:hsifuhi234klerlf...sadasd |
| TELEGRAM_BOT_CHAT_ID | The chat id of the chat where the bot should send the messages | 123456789 |
| TELEGRAM_API_ENABLED | If the telegram api should be enabled. | true |
You can acquire the Telegram Bot chat id with the following steps:
- Write a message to the bot
- Open the following url in your browser: Telegram API page
- Search for the chat id in the response
Proxying requests to the podcast servers
In some cases you also need to proxy the traffic from the PodFetch server via a proxy. For that exists the PODFETCH_PROXY variable. You set it to the address of your proxy.
Internationalization
Podfetch is available in multiple languages.
If you want to add a new language you can do so by adding a new file to thei18n folder and adding the translations
to the file. The file should be named after the ISO 639-1
language code. For example en.json for English or de.json for German.
If you want to add a new language, please take a look at this file to see which translations are required. You only need to add the translations for the values.
RSS Feed
You can use the RSS feed to get the latest updates from the site. The feed is available at the following URL:
http://<your_ip>/rss
You can also control the output of the feed by using the following parameter:
- top: The number of items to return
So if you want to get the latest 5 items from the feed from each podcast, you can use the following URL:
http://<your_ip>/rss?top=5
Podcast Index
It is also possible to retrieve/add podcasts from Podcast Index. To configure it you need to create an account on that website. After creating an account an email is sent to you with the required credentials.
| Variable | Description | Default |
|---|---|---|
| PODINDEX_API_KEY | the api key sent to you via mail | % |
| PODINDEX_API_SECRET | the api secret also found in the mail | % |
- % means an empty string is configured as default
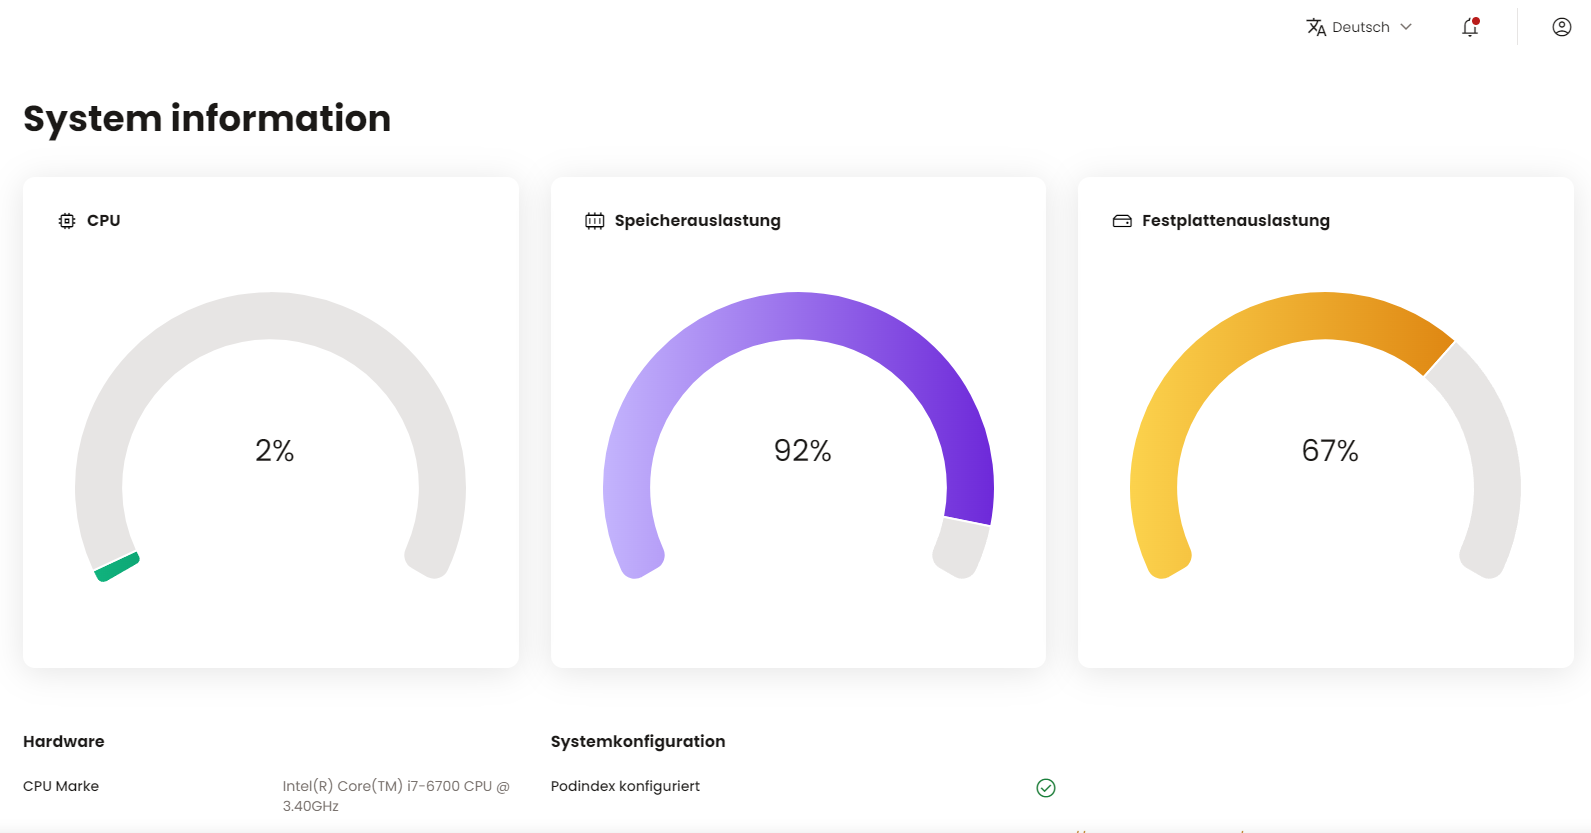
After successful setup you should see on the settings page a green checkmark next to the Podindex config section.
CLI usage
The CLI can be used to manage users and to refresh & list subscribed podcasts.
You can get help anytime by typing --help or help.
Usage
Get general help
podfetch --help
Get help for a specific command
podfetch <command> --help
e.g.
podfetch users --help
podfetch podcasts --help
Usage in docker
docker ps #This will help you obtain the container's id and name
docker exec -it <container id or name> /app/podfetch <your-command> # Will execute your desired command in the container
Contributing
Preamble
First of all, thank you for considering contributing to Podfetch. It is people like you that make Podfetch great. I appreciate every contribution, no matter how small it is. If you have any questions, don't hesitate to ask them in the discussions section.
Building the project
Prerequisites
- Rust
- Cargo
- Node
- npm/yarn/pnpm
Building the app
# File just needs to be there
touch static/index.html
cargo.exe run --color=always --package podfetch --bin podfetch
cd ui
<npm/yarn/pnpm> install
<npm/yarn/pnpm> run dev
Setting up Basic auth and user management
- Set up the environment variables in your docker-compose under the PodFetch service:
BASIC_AUTH: true
USERNAME: test
PASSWORD: test
- Run
docker-compose up -dto start the service.
Make sure to change the username and password to something more secure than test and test.
UI Login
Enter your credentials from step 1. If you don't want to enter always username and password you can click on memorize account. This is not recommended if this computer is not yours/shared with others.

- [Optional] Invite other users to your instance
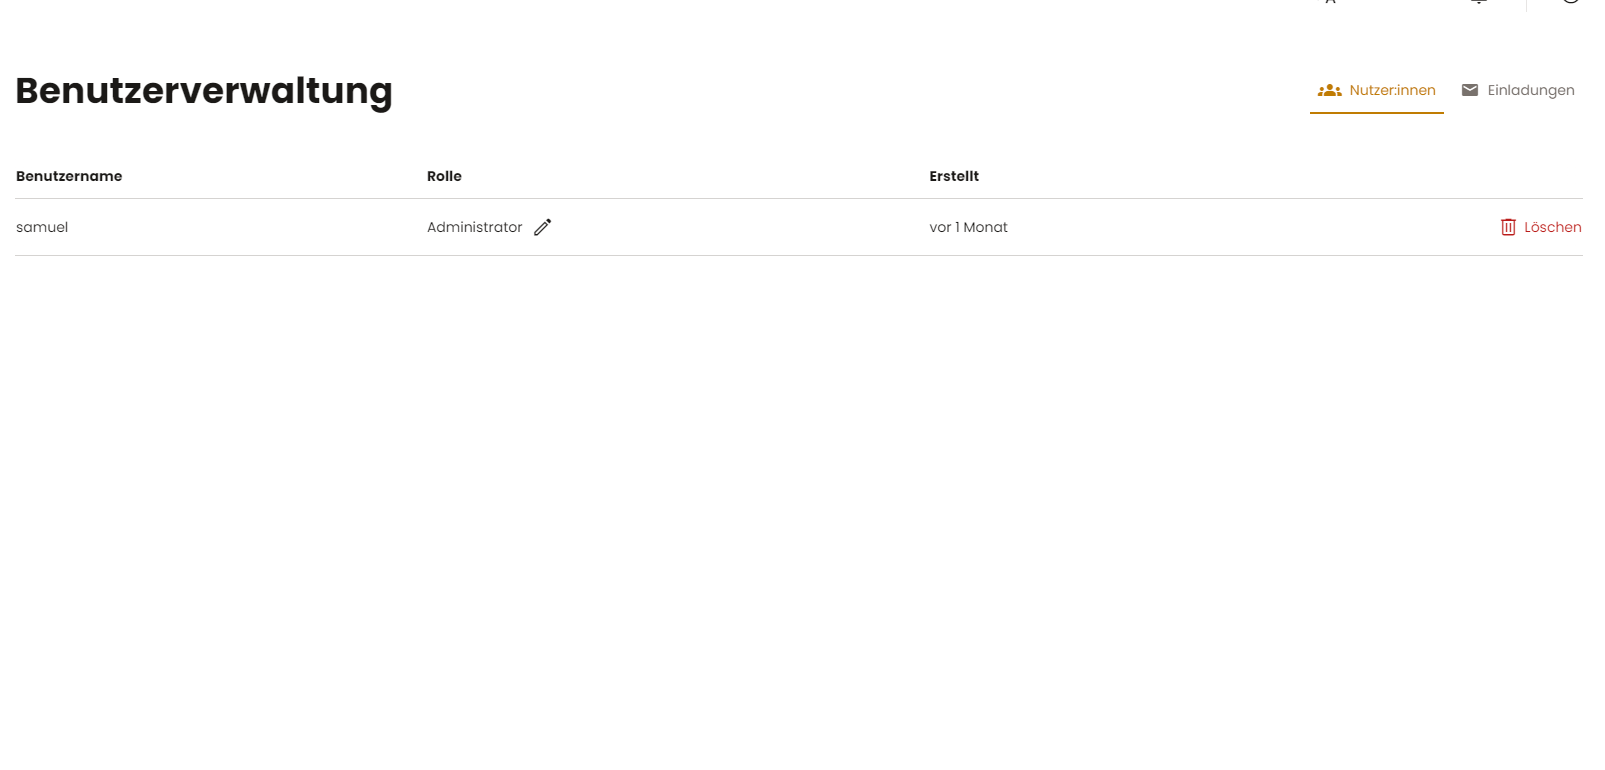
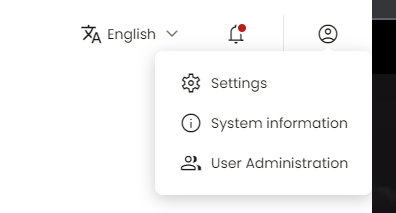
Because listening to podcasts is kind of boring you can invite your family/friends to also use your podcast server to stream podcasts. Therefore go to User administration which is found in the top right corner when clicking on the user avatar icon.
Here you can view all the existing users:
You can edit their role by clicking on the pencil in the role column or delete them by clicking on the trash icon. You can create a new invitation by selecting the "Invites" tab on the right hand, Click on +Add new. Here you can select the role of the user to invite and if he is allowed to listen to explicit podcasts. After that click on createInvite. You can now see the invite in the table. It has an expiracy date of 1 week. So after 1 week the invite cannot be used again. You can click on the link icon to copy the invite link and paste it into e.g. Discord/WhatsApp or your messenger of choice.
On the other end the invitee can simply copy that link, paste it into his/her browser and take the registration steps. He/She can review the settings taken by the administrator and enter a username/password for the login page. The password needs to be strong. So it must have a length of 8, a number, a small letter and a capital letter.
E.g.:
- ✅ Test123$Test
- ✅ myComplicated$Password
- ❌ test
- ❌ weakPassword
Upon succesful registration you should see a success message with account created. Now the user should be redirected to /ui and can also login as the administrator has done it in the second step.
GPodder API
📖 Activating the GPodder API
The following environment variable must be set to true to enable it:
| Variable | Description | Default |
|---|---|---|
| GPODDER_INTEGRATION_ENABLED | Activates the GPodder integration via your SERVER_URL | false |
⚙️ Using the GPodder API
For the GPodder API, you need to choose a way to authenticate yourself. You can use:
- Basic Auth
- OAuth2
- Proxy Auth
👤 Create a user via the CLI
For AntennaPod to succesfully authenticate it requires a username and password. In order to enable that we jump to the commandline. If you have PodFetch running in Docker just execute:
docker ps #This will help you obtain the container's id and name
docker exec -it <your-container-id> /app/podfetch users add
After that a dialog opens up. I paste here a sample you can change username and password etc. to the values you like.
Starting from command line
User management
Enter your username:
myUsername
User does not exist
Enter your password:

Select your role user, admin, uploader
user
Should a user with the following settings be applied User { id: 0, username: "myUsername", role: "user", password: Some("myPassword"), explicit_consent: false, created_at: 2023-07-22T10:39:59.297771400 }
Y[es]/N[o]
Yes
User succesfully created
After that you have created a user with the username myUsername and the password: myPassword. It is enough to have him assigned to the role user. You could e.g. switch to another admin user that adds new podcasts for increased security.
🖂 Create a user via the UI
You can also generate a user using the invite function within the GUI
To generate an invite, log into Podfetch → Top Right Icon → User Administration → Invites . This works on both basic auth and OIDC.
📱 Setting up AntennaPod
First download the app:
- Google: https://play.google.com/store/apps/details?id=de.danoeh.antennapod&hl=de&gl=US
- FDroid: https://f-droid.org/de/packages/de.danoeh.antennapod/ ⚠️ Be aware that the FDroid version doesn't have the Google signing for usage in an Android car. So if you have an Android Car and want to navigate via the built-in touchscreen you definitely need the one from the Google App Store
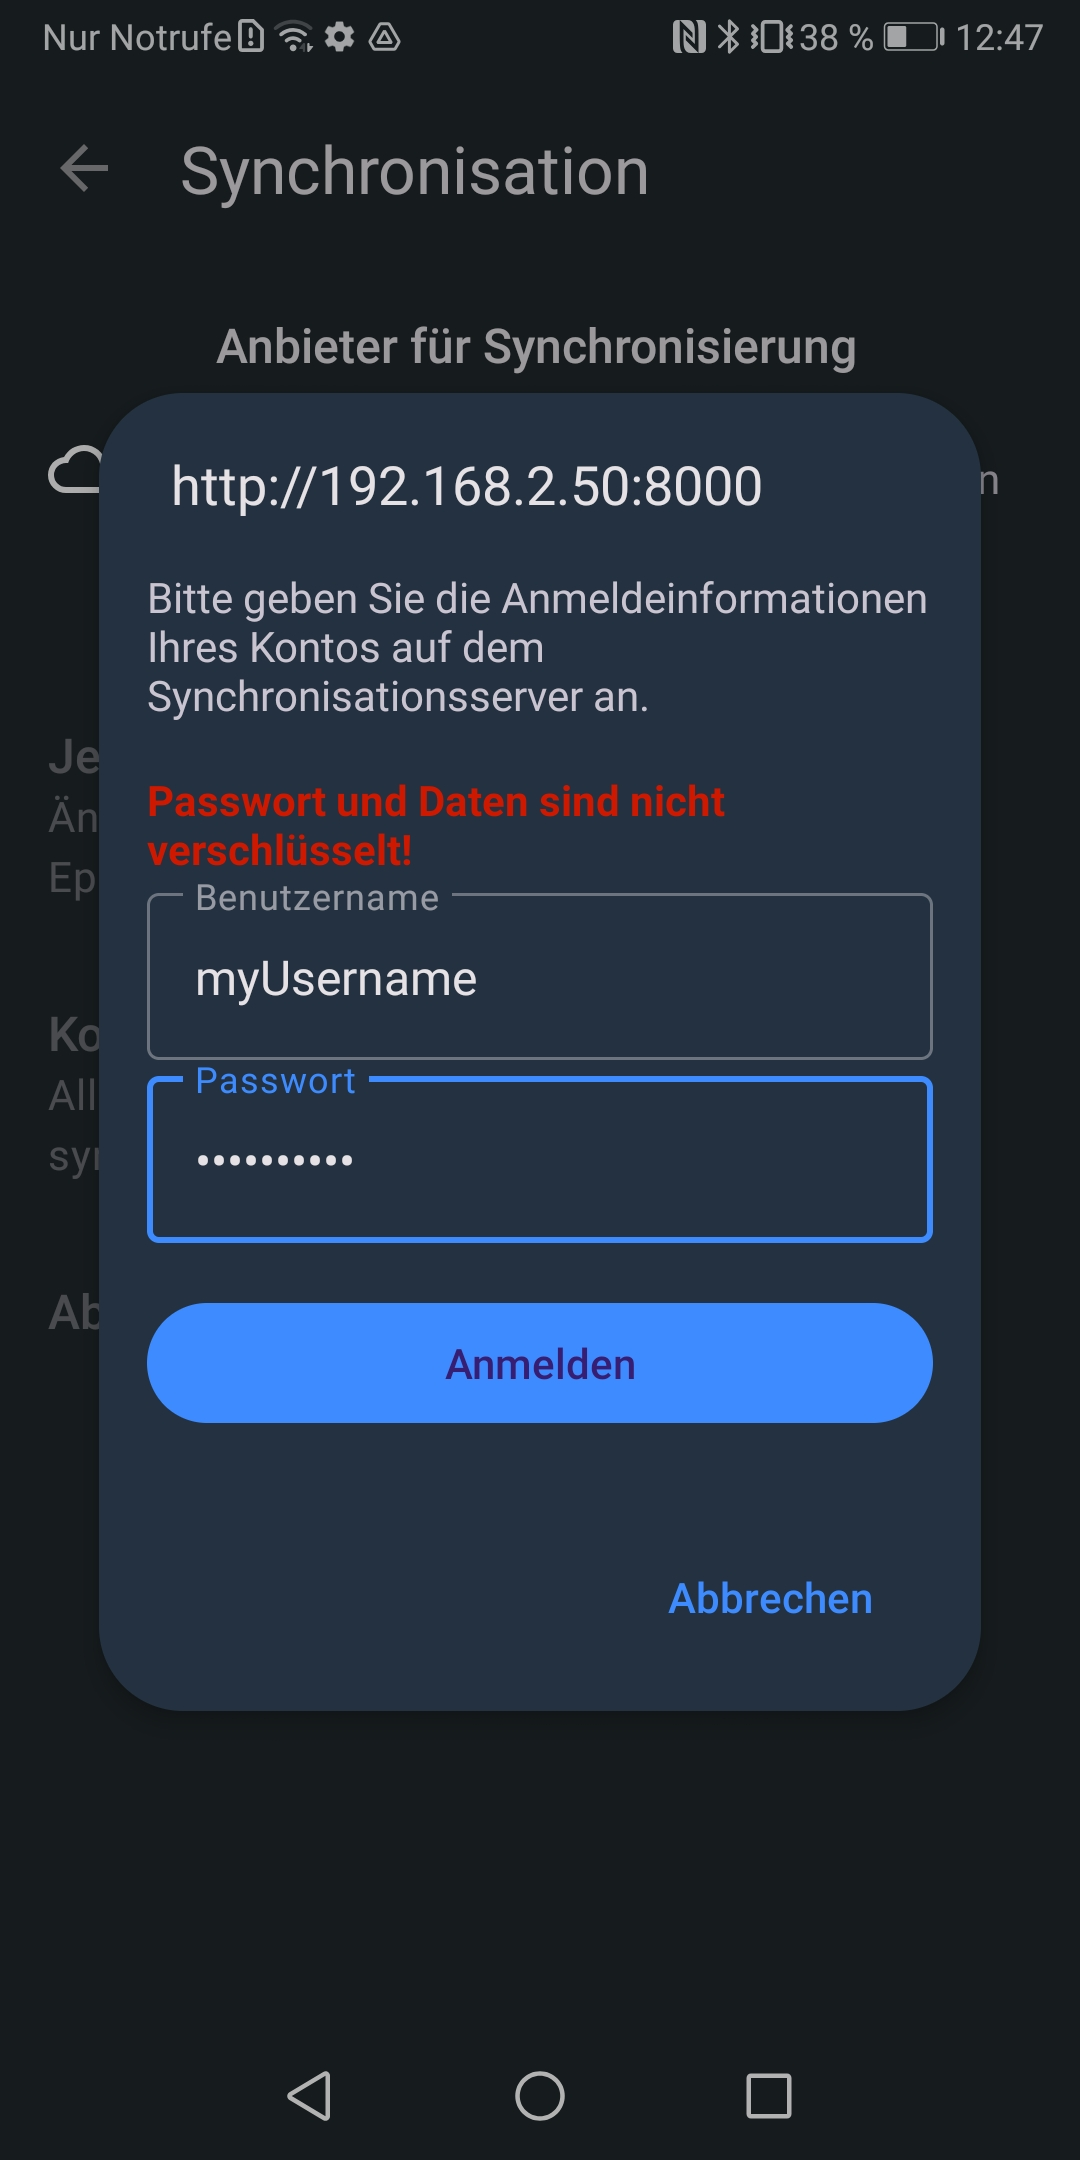
After opening the app, press the burger menu and tap settings. Go to synchronisation => Select provider => GPodder.net
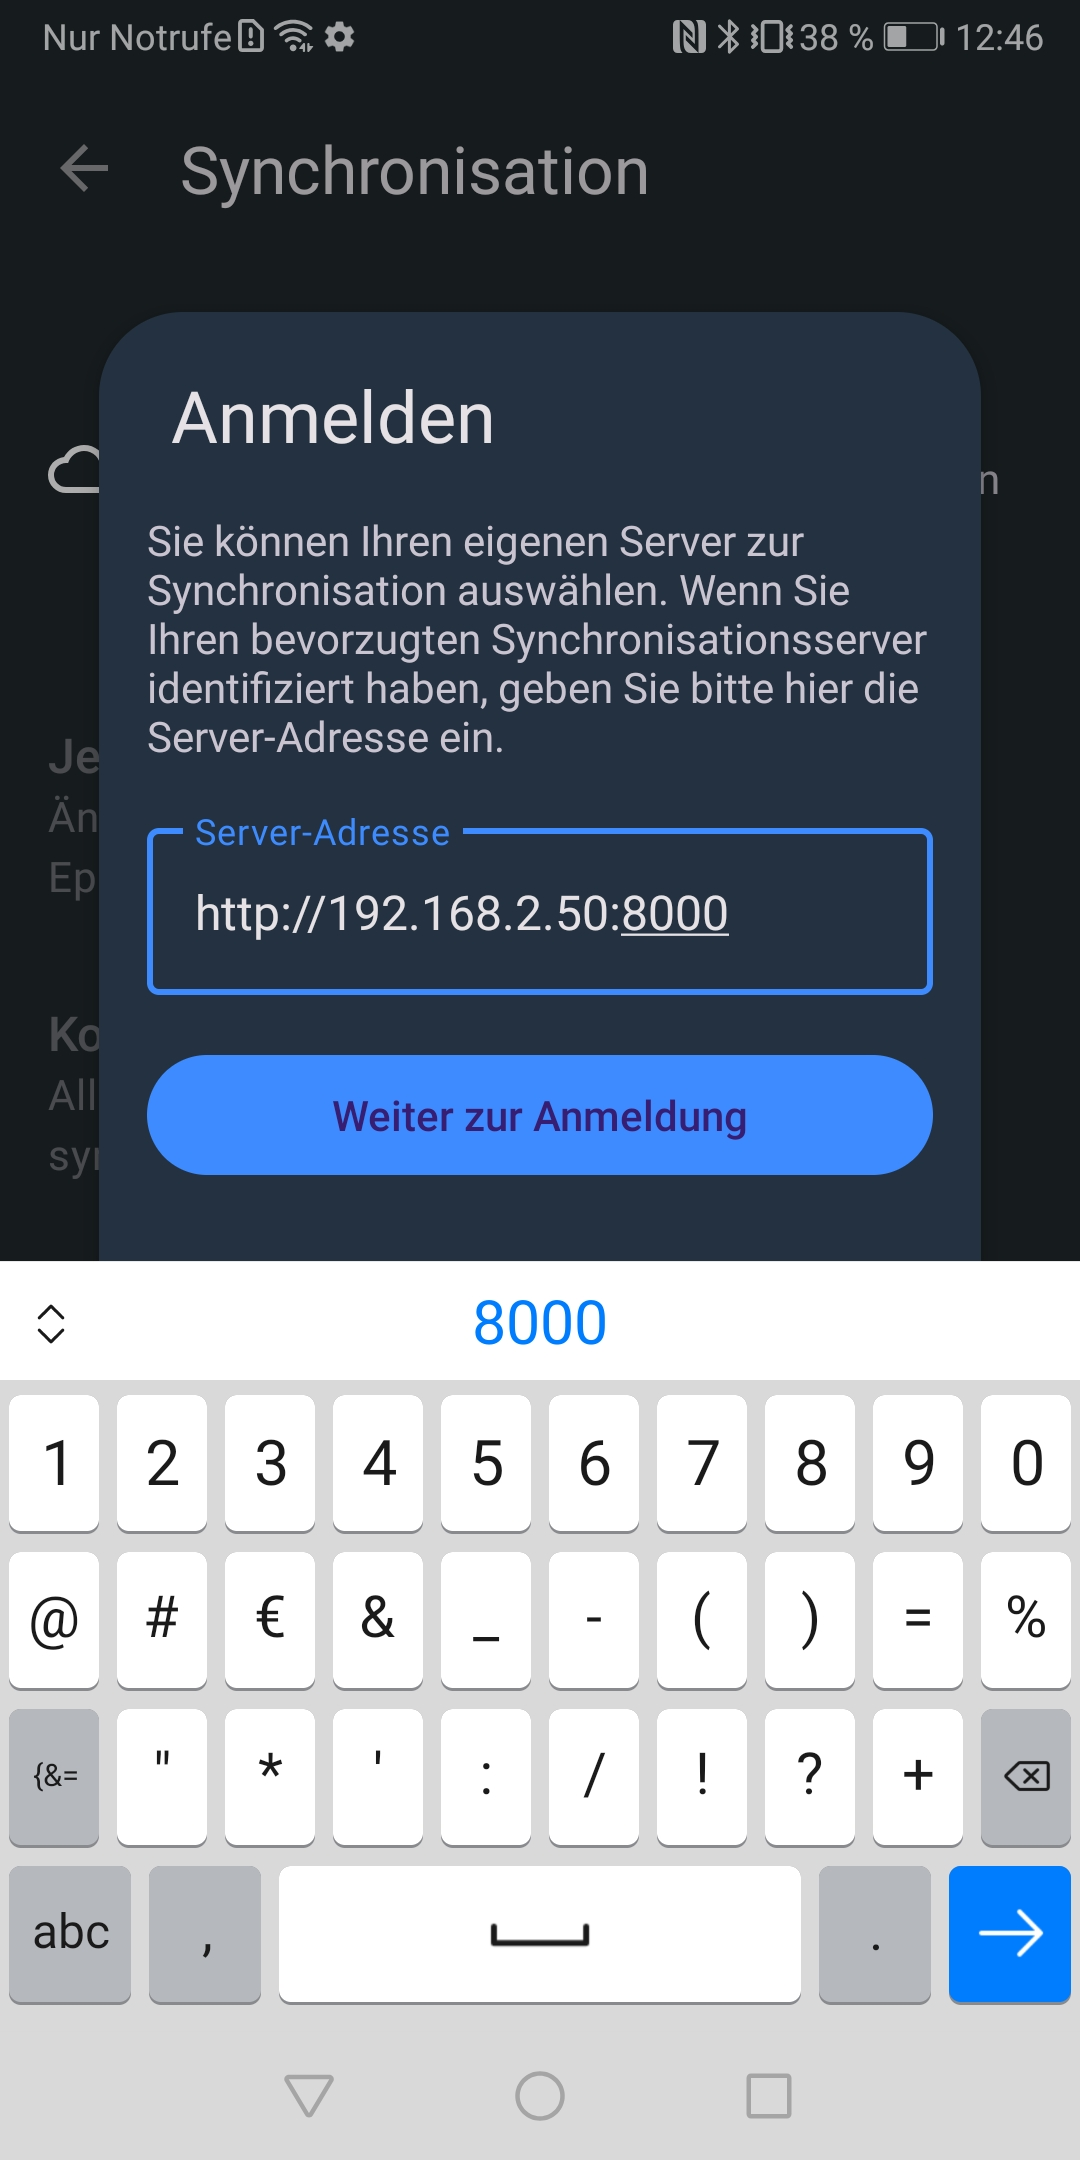
- Enter here your SERVER_URL
⚠️ AntennaPod always chooses https and thus requires a valid SSL certificate from e.g. Let's Encrypt. If you want to host PodFetch in your local network it is okay to not use SSL. Therefore you can use http:// to establish an insecure connection which AntennaPod will complain in the next steps about.
- Enter the username and password of the user that you created before through the CLI
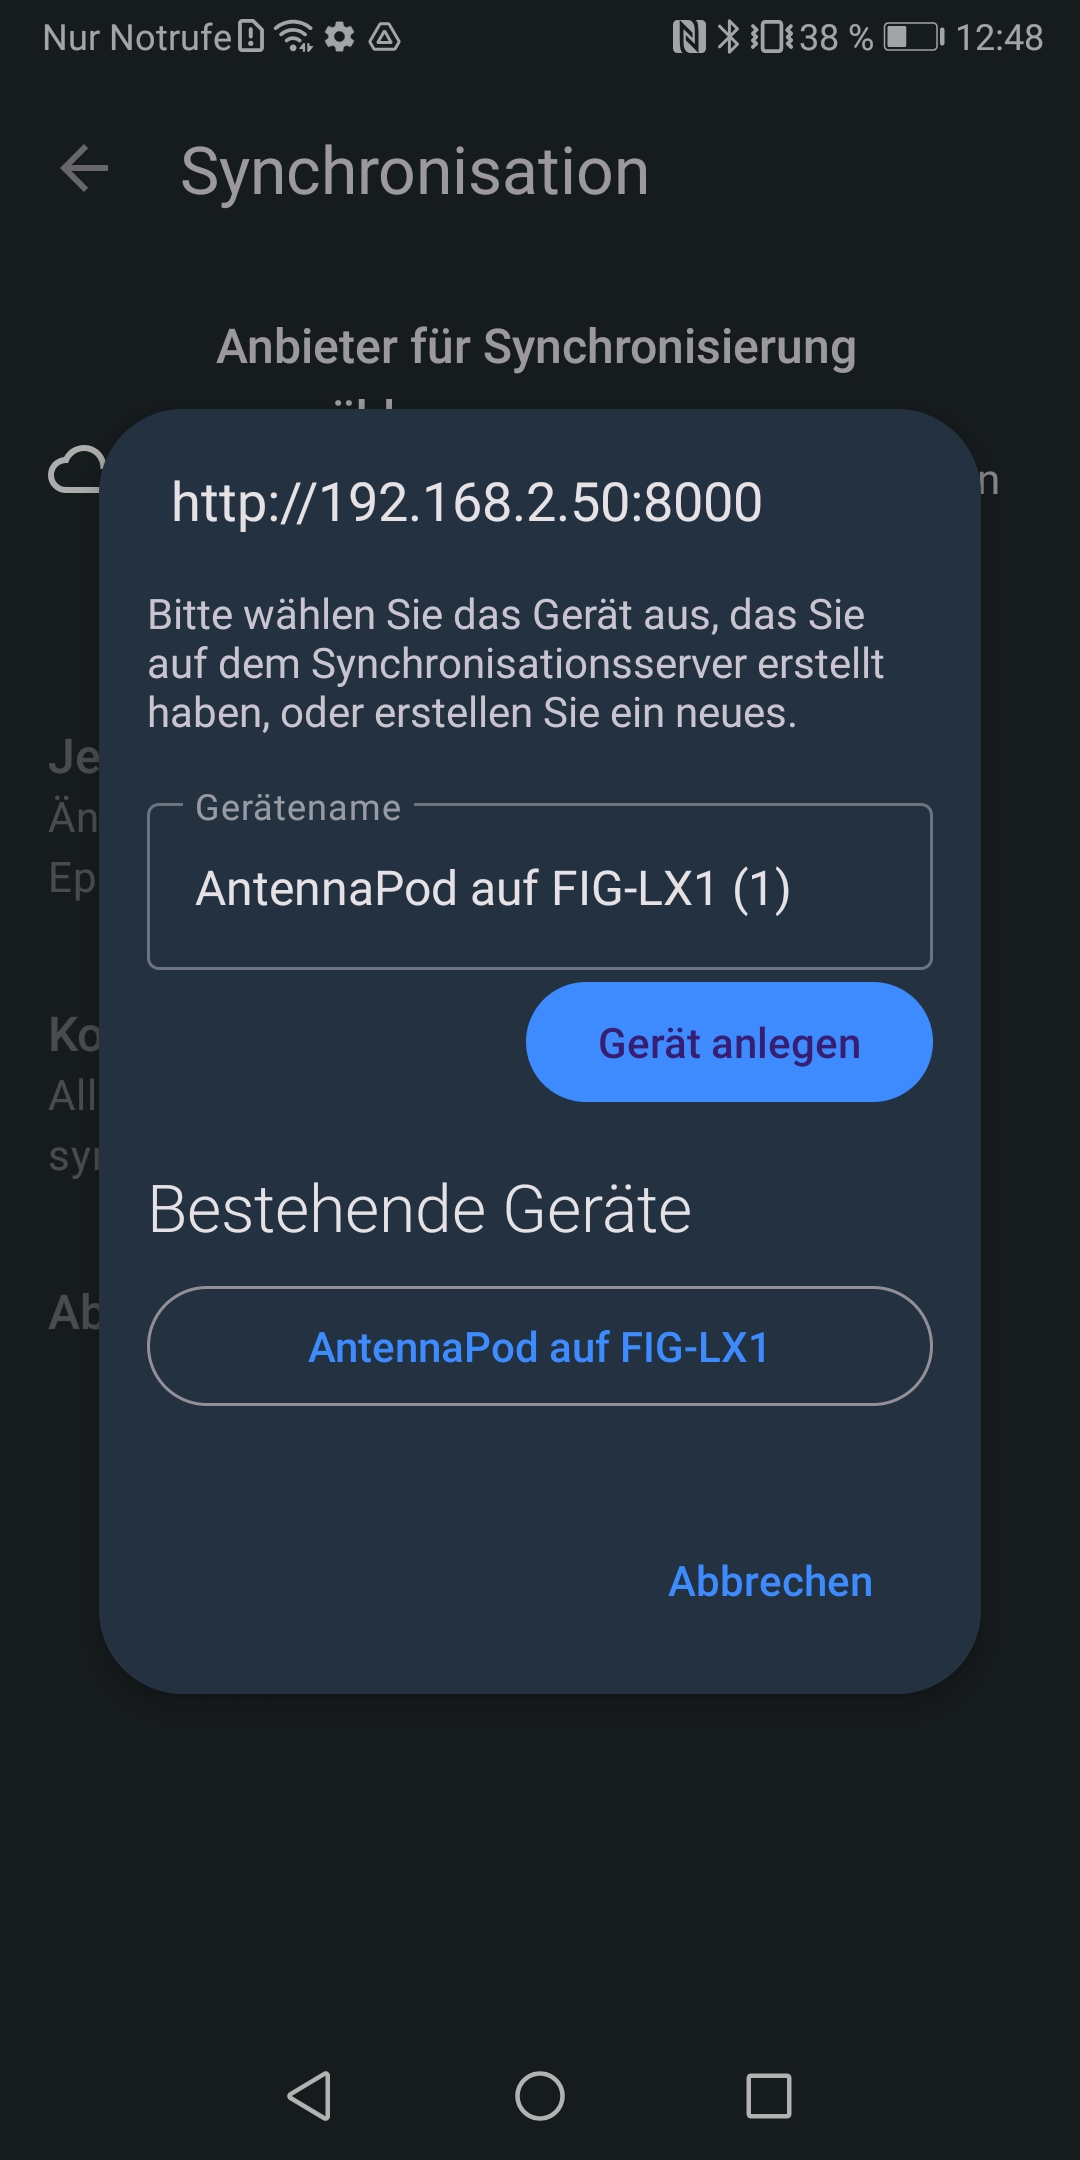
- Choose an existing device or create a new device
A user can have different devices or restore from existing device configuration. This is what the next view is about. You can choose between using an existing device. That is the ovale device below. This can be done by simply tapping on it.
If you don't see a device because you started the server from scratch you can name your device to a memorable one so you can later select the correct device better.
- Success screen
You should now see this screen. Tap on Sync now and the modal should close leaving you at the synchronisation page.
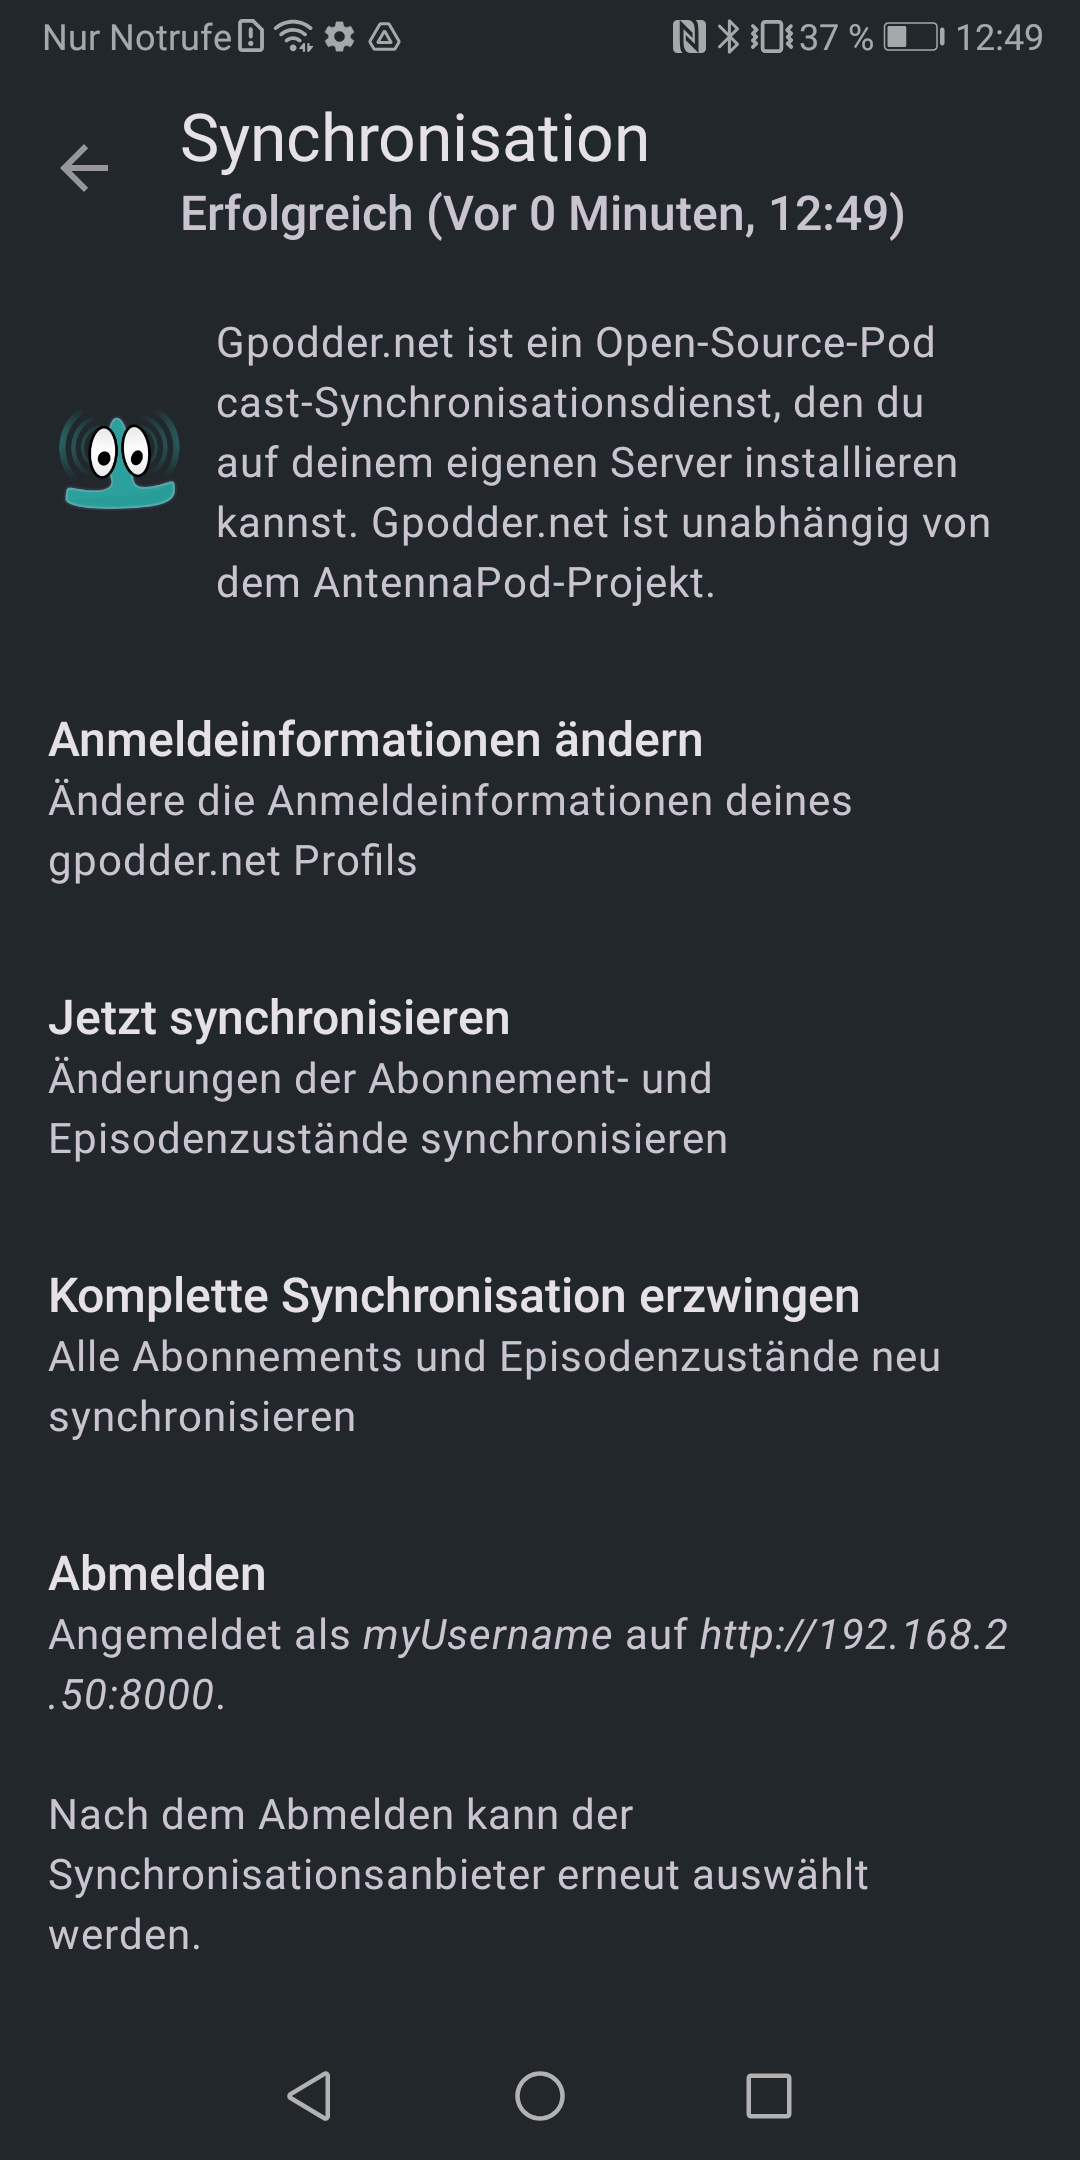
-
Test the settings You can test the settings by tapping on Sync now. After a short period the title on the navbar should change to Success #currentTimestamp
-
Import the respective podcast into podcast Because not everybody can download/create a podcast it is necessary to also download a podcast to the server. Therefore go to the homepage and add the podcast. If the rss feeds are the same they are linked in the backend and you can listen to the podcasts from your phone or via the web and the two locations synchronize with each other.
Pitfalls
My server is not reachable from the internet
- Check your firewall
- Make sure you can ping the system
My PodFetch server does not show any images
- Make sure your
SERVER_URLis set correctly - Make sure your
SERVER_URLis reachable from the internet
I cannot login to the UI
- Make sure you have set up the
BASIC_AUTHenvironment variable - Make sure you have set up the
USERNAMEenvironment variable - Make sure you have set up the
PASSWORDenvironment variable - Otherwise, reset your password via the CLI
I can't stream any podcasts with authentication enabled
- Make sure your user has an api key
- Otherwise, generate one via the UI in the profile tab.